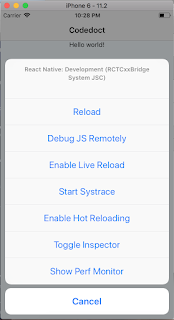
Pada tutorial sebelumnya kita sudah membuat sebuah project react native sederhana dengan perubahan routing dan penambahan header App, tutorial kali ini kita akan belajar code sederhana dalam react native.
Karena react sendiri merupakan bahasa nativenya maka react native ini sangat berbeda dengan permrograman html biasa, untuk dari sisi Frontend react native memiliki syntax-nya sendiri.
Oke kita mulai saja pemahaman basic code pada react native ini,
Buka kembali file home.js yang sudah kita buat pada tutorial sebelumnya, dan edit menjadi seperti ini,
/**
 * Sample React Native App
 * https://github.com/facebook/react-native
 * @flow
 */
import React, { Component } from 'react';
import {
  NavigatorIOS,
  TouchableHighlight,
  TouchableOpacity,
  TouchableNativeFeedback,
  TouchableWithoutFeedback,
  ScrollView,
  FlatList,
  SectionList,
  ActivityIndicator,
  ListView,
  Button,
  Alert,
  Image,
  TextInput,
  Platform,
  StyleSheet,
  Text,
  View
} from 'react-native';

export default class NavigatorIOSApp extends Component {
  render() {
    return (
      <NavigatorIOS
        initialRoute={{
          title: 'Codedoct',
          component: HelloWorld,
        }}
        style={{flex: 1}}
      />
    );
  }
}

class HelloWorld extends Component {
  render() {
    return (
      <View style={styles.container}>
        <Text>Hello world!</Text>
      </View>
    )
  }
}

class InputImageAndProps extends Component {
  render() {
    let pic = {
      uri: 'https://upload.wikimedia.org/wikipedia/commons/d/de/Bananavarieties.jpg'
    };
    return (
      <View style={styles.container}>
        <Image source={pic} style={{width: 193, height: 110}}/>
        <Greeting name='Rexxar' />
        <Greeting name='Jaina' />
        <Greeting name='Valeera' />
      </View>
    );
  }
}
//component greeting
class Greeting extends Component {
  render() {
    return (
      <Text>Hello {this.props.name}!</Text>
    );
  }
}

class HeightAndWidth extends Component {
  render() {
    return (
      <View style={styles.container}>
        <View style={{width: 50, height: 50, backgroundColor: 'powderblue'}} />
        <View style={{width: 100, height: 100, backgroundColor: 'skyblue'}} />
        <View style={{width: 150, height: 150, backgroundColor: 'steelblue'}} />
      </View>
    );
  }
}
class HeightAndWidthFull extends Component {
  render() {
    return (
      <View style={{flex: 1}}>
        <View style={{flex: 1, backgroundColor: 'powderblue'}} />
        <View style={{flex: 2, backgroundColor: 'skyblue'}} />
        <View style={{flex: 3, backgroundColor: 'steelblue'}} />
      </View>
    );
  }
}

class HandlingTextInput extends Component {
  constructor(props) {
    super(props);
    this.state = {
      text: ''
    };
  }

  render() {
    return (
      <View style={styles.container}>
        <TextInput
          style={{height: 40}}
          placeholder="Type here to translate!"
          onChangeText={(text) => this.setState({text})}
        />
        <Text style={{padding: 10, fontSize: 42}}>
          {this.state.text.split(' ').map((word) => word && '🍕').join(' ')}
        </Text>
      </View>
    );
  }
}

class HandlingTouches extends Component {
  _onPressButton() {
    Alert.alert('You tapped the button!')
  }

  render() {
    return (
      <View style={styles.container}>
        <Button
          onPress={() => {
            Alert.alert('You tapped the button!');
          }}
          title="Press Me"
        />
        <Button
          onPress={this._onPressButton}
          title="Press Me"
        />
        <TouchableHighlight onPress={this._onPressButton} underlayColor="white">
          <View style={styles.button}>
            <Text style={styles.buttonText}>TouchableHighlight</Text>
          </View>
        </TouchableHighlight>
        <TouchableOpacity onPress={this._onPressButton}>
          <View style={styles.button}>
            <Text style={styles.buttonText}>TouchableOpacity</Text>
          </View>
        </TouchableOpacity>
        <TouchableNativeFeedback
            onPress={this._onPressButton}
            background={Platform.OS === 'android' ? TouchableNativeFeedback.SelectableBackground() : ''}>
          <View style={styles.button}>
            <Text style={styles.buttonText}>TouchableNativeFeedback</Text>
          </View>
        </TouchableNativeFeedback>
        <TouchableWithoutFeedback
            onPress={this._onPressButton}
            >
          <View style={styles.button}>
            <Text style={styles.buttonText}>TouchableWithoutFeedback</Text>
          </View>
        </TouchableWithoutFeedback>
        <TouchableHighlight onPress={this._onPressButton} onLongPress={this._onLongPressButton} underlayColor="white">
          <View style={styles.button}>
            <Text style={styles.buttonText}>Touchable with Long Press</Text>
          </View>
        </TouchableHighlight>
      </View>
    );
  }
}

class UsingAScrollView extends Component {
  render () {
    return(
      <View style={styles.container}>
        <ScrollView>
          <Text style={{fontSize: 100}}>
            start to scroll start to scroll start to scroll start to scroll start to scroll start to scroll start to scroll
          </Text>
        </ScrollView>
      </View>
    )
  }
}

class UsingListViews extends Component {
  render () {
    return(
      <View style={styles.container}>
        <FlatList
          data={[
            {
              key: 'Devin'
            },
            {key: 'Jackson'},
            {key: 'James'},
            {key: 'Joel'},
            {key: 'John'},
            {key: 'Jillian'},
            {key: 'Jimmy'},
            {key: 'Julie'},
          ]}
          renderItem={({item}) => <Text>{item.key}</Text>}
        />
      </View>
    )
  }
}
class UsingListViews2 extends Component {
  render () {
    return(
      <View style={styles.container}>
        <SectionList
          sections={[
            {title: 'D', data: ['Devin']},
            {title: 'J', data: ['Jackson', 'James', 'Jillian', 'Jimmy', 'Joel', 'John', 'Julie']},
          ]}
          renderItem={({item}) => <Text>{item}</Text>}
          renderSectionHeader={({section}) => <Text style={styles.sectionHeader}>{section.title}</Text>}
          keyExtractor={(item, index) => index}
        />
      </View>
    )
  }
}

class Networking extends Component {
  constructor(props) {
    super(props);
    this.state = {
      isLoading: true
    }
  }

  async componentDidMount() {
    // ada 2 cara
    // 1. fetch yang akan mengembalikan sebuah promise
    // return fetch('https://facebook.github.io/react-native/movies.json')
    //   .then((response) => response.json())
    //   .then((responseJson) => {
    //     let ds = new ListView.DataSource({rowHasChanged: (r1, r2) => r1 !== r2});
    //     this.setState({
    //       isLoading: false,
    //       dataSource: ds.cloneWithRows(responseJson.movies),
    //     }, function() {
    //       // do something with new state
    //     });
    //   })
    //   .catch((error) => {
    //     console.error(error);
    //   });

    // 2. async await (kita akan lebih sering menggunakan cara async await untuk tutor2 selanjutnya)
    try {
      let response = await fetch(
        'https://facebook.github.io/react-native/movies.json'
      );
      let responseJson = await response.json();
      let ds = new ListView.DataSource({rowHasChanged: (r1, r2) => r1 !== r2});
      this.setState({
        isLoading: false,
        dataSource: ds.cloneWithRows(responseJson.movies),
      }, function() {
        // do something with new state
      });
    } catch (error) {
      console.error(error);
    }
  }

  render() {
    if (this.state.isLoading) {
      return (
        <View style={styles.container}>
          <ActivityIndicator />
        </View>
      );
    }

    return (
      <View style={styles.container}>
        <ListView
          dataSource={this.state.dataSource}
          renderRow={(rowData) => <Text>{rowData.title}, {rowData.releaseYear}</Text>}
        />
      </View>
    );
  }
}

const styles = StyleSheet.create({
  container: {
    flex: 1,
    justifyContent: 'flex-start',
    alignItems: 'center',
    marginTop: 65,
    backgroundColor: '#F5FCFF',
  },
  button: {
    marginBottom: 30,
    width: 260,
    alignItems: 'center',
    backgroundColor: '#2196F3'
  },
  buttonText: {
    padding: 20,
    color: 'white'
  },
  sectionHeader: {
    paddingTop: 2,
    paddingLeft: 10,
    paddingRight: 10,
    paddingBottom: 2,
    fontSize: 14,
    fontWeight: 'bold',
    backgroundColor: 'rgba(247,247,247,1.0)',
  },
});t
Pada code tersebut codedoct sudah menambahkan beberapa contoh basic code pada react native, kita akan mengulasnya satu persatu.
Pertama belajar Input Image dan bermain dengan Props, untuk mencobanya mudah pada code dibawah ini,
export default class NavigatorIOSApp extends Component {
  render() {
    return (
      <NavigatorIOS
        initialRoute={{
          title: 'Codedoct',
          component: HelloWorld,
        }}
        style={{flex: 1}}
      />
    );
  }
}
Dapat kita lihat pada component kita memanggil class HelloWorld, coba kita ganti dengan class InputImageAndProps seperti ini,
export default class NavigatorIOSApp extends Component {
  render() {
    return (
      <NavigatorIOS
        initialRoute={{
          title: 'Codedoct',
          component: InputImageAndProps,
        }}
        style={{flex: 1}}
      />
    );
  }
}
Maka hasilnya akan tampak seperti ini,
Pahamilah basic code-nya, bagaimana syntax yang ditulis agar dapat memperoleh UI seperti pada gambar diatas.
Sekarang lanjutkan dengan class-class berikutnya dengan cara yang sama dengan cara sebelumnya yaitu mengganti nama componentnya.
HeightAndWidth
HeightAndWidthFull
HandlingTextInput
HandlingTouches
UsingAScrollView
UsingListViews
UsingListViews2
Networking
===DONE!===


